Contents
- Tell a fit issue from a closure issue
- Test the movements you make throughout the day
- Compare another size and cut
- Check how your undergarments and the rest of your outfit affect the fit
- Choose a sensible temporary fix
- When a snap or alteration can help
- Check the fabric before making any changes
- Get ready for a productive alteration appointment
- Frequently asked questions
- Sources and references
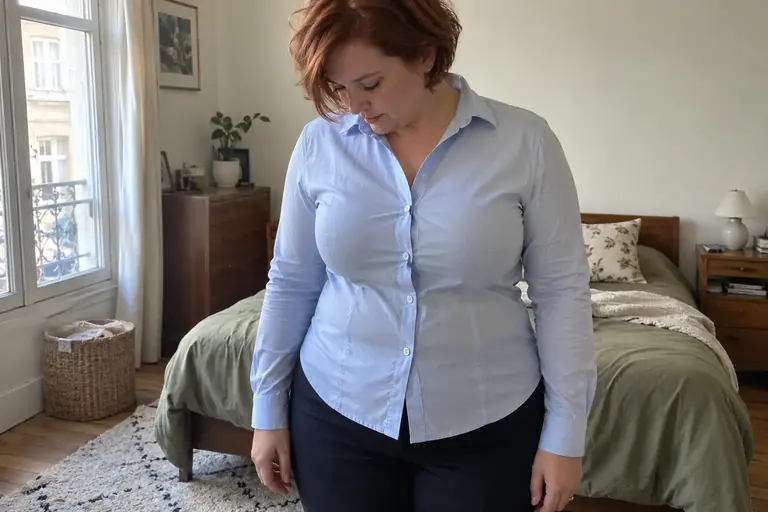
A shirt that stays closed in front of the mirror can gap as soon as you reach your arms forward or sit down. It’s tempting to pinch the placket together with a pin, then keep an eye on the buttons all day. It’s more useful to figure out what’s making the shirt open up: overall tension, button placement, slippery fabric, or a cut that doesn’t suit you.
A gaping shirt calls for trying it on in motion first. If the fabric pulls in several areas, look for a different cut or a better-fitting size. If the shirt is comfortable and only one gap opens, a small added closure may be enough. An accessory shouldn’t have to hold a shirt that’s too tight in place.
Tell a fit issue from a closure issue
Put on the shirt with the undergarments you plan to wear, then button it as usual. Stand naturally without sucking in your stomach or pulling your shoulders back. Check for horizontal lines stretching from the buttons, a pulling shoulder seam, or a back that feels too tight. These signs can’t diagnose a sewing issue remotely, but they suggest the problem may be more than a simple gap between buttons.
By contrast, the shirt may hang well and feel comfortable everywhere, yet open in one spot as soon as you turn your torso slightly. Button placement or a flexible placket may be part of the reason. For a simple way to tell, ask yourself: do the two sides meet naturally, or do you have to pull them together to keep the shirt closed? That distinction can guide what you try next.
Test the movements you make throughout the day
Sit on a chair, reach your arms forward as if you were at a keyboard, and pick up an object beside you. Notice what happens around your chest, stomach, and upper back. If you’ll wear this shirt to work, try it on under your jacket too: a sleeve that’s too tight or an armhole that restricts movement can change how you move and pull at the front.
Don’t limit yourself to raising your arms high overhead. That movement can be useful, but it doesn’t reflect an entire day. The test should mainly mimic your everyday movements: driving, writing, leaning toward a bag, carrying a folder. A shirt that only works when you’re still may require constant readjusting. Our guide to wearing a white shirt offers outfit ideas; start here by checking that the base layer is comfortable.
Compare another size and cut
Try the next size up if it’s available, and compare a different cut too. A larger size may give you more room in front while making the shoulders or sleeves too big. A cut with more room through the bust may solve the problem another way. Terms like “straight,” “relaxed,” or “fitted” vary by brand: look at the garment itself, not just the name on the label.
If you’re ordering online, look for garment measurements when available and compare them with a shirt in your wardrobe that feels comfortable. Measure both flat in the same way, without stretching the fabric. Body measurements and garment measurements describe different things; don’t compare them as if they were interchangeable. Leave enough room to move for the way you’ll wear it, rather than aiming for a universal number.
Check how your undergarments and the rest of your outfit affect the fit
Try it on again with the undergarments you actually plan to wear. Their shape can change how the shirt sits, but that doesn’t mean you need to replace all your lingerie to make the garment work. If the style only works with one very specific combination, consider whether you’re comfortable with that constraint.
See what happens when the shirt is tucked into your pants too. Very fitted bottoms can hold the fabric in place and create tension when you sit down. Loosen the fabric a little above the waistband, then move around again. If that makes a clear difference, the issue is partly the combination. If the gap remains even with the shirt untucked, look for another cause instead of tucking the fabric in more tightly.
 Read alsoHow to put together a harmonious outfit with what you have
Choose a sensible temporary fix
For a one-time occasion, wearing the shirt open over a suitable top may be the simplest solution. It intentionally changes the look without putting the closure under strain. A camisole can also work under a shirt that stays slightly open, as long as the whole outfit feels comfortable and gives you the look you want.
A fabric adhesive designed for this purpose may work for some fabrics, but check the instructions and test it in an inconspicuous spot first. It may leave a mark or fail to stick, depending on the material. Avoid improvising with household glue, packing tape, or adhesive directly on your skin. A safety pin placed incorrectly can snag the fabric or get in the way when you move; it shouldn’t become a permanent fix for an area under tension.
Flip cards
What should you look into?
Several buttons pull, and the back feels tightFlip
First, compare the size and fit. Adding a closure won’t give you the extra room you need.
One gap opens, with no visible tensionFlip
Ask a tailor to check the placement of a snap or small additional closure on the placket.
The opening appears only when you tuck in the shirtFlip
Check the pull from your belt and try again with a little more room.
The shirt is new and has never felt comfortableFlip
Choose an exchange for a better fit rather than a string of fixes that make the shirt harder to wear.
When a snap or alteration can help
A small snap sewn inside the placket can keep a gap from opening when the fit is already right. Its placement, size, and fastening method depend on the fabric. On a lightweight material, the stitching may show or distort the surface; on a narrow placket, there may not be enough room. Take the shirt to a tailor and show them the problem while sitting down.
Moving a button slightly is another option in some cases, but it can shift the placket and change how the shirt hangs. Don’t assume it will give you much more room. Adding fabric, altering darts, or making more complex construction changes requires an assessment and an estimate. Our guide to sewing on a button covers a simple repair; it doesn’t replace adjusting an entire shirt.
Check the fabric before making any changes
Check the fiber content and care instructions. The DGCCRF notes that the fiber content label lists the fibers used; however, it isn’t enough to determine an alteration technique. The same fiber can be used in very different fabrics, and the finishes matter too.
Don’t try to stretch the shirt by pulling hard on the damp area or applying heat locally. You could shift the seams, mark the fabric, or cause uneven distortion. Follow the garment’s care instructions. If the garment changed size after washing, compare the details before taking action: the cycle used, the instructions, and its condition before and after. An alteration considered too soon could complicate an exchange with the seller.
Get ready for a productive alteration appointment
Wear the undergarments and bottoms you plan to wear with it, bring the jacket if it affects how you move, and explain which position makes the opening appear. Ask what will be changed, whether the stitching will show, and whether the shirt will still have enough room. A fitting with pins often gives you a clearer idea of the expected result than an abstract explanation.
The ADEME encourages repairing clothes to extend their use. That doesn’t mean every alteration is worth the cost or possible. Compare the cost, the quality of the garment, and how much you really want to wear it. If the shirt is well made but its fit means you need to make several changes, another style may be a better choice for your next purchase.
Check off
Before I settle on my solution
0 / 5
You can choose a solution that fits the problem you’ve observed.
Watch a practical example
A visual example from Scrappy Treasures to compare with the steps in this guide.
Video in English
Frequently asked questions
Does a gaping shirt always mean it’s too small?
Not always. The cut, button placement, and tension created by the way you wear it can all play a part. But if the fabric pulls in several areas, compare sizes and cuts before adding a fastener.
Can you add a snap to any shirt?
No. Fabric weight, placket width, and how visible the stitching will be all matter. Have the shirt assessed if you want a discreet, durable result.
Should you unpick the darts to make more room?
It’s not a one-size-fits-all solution. Old stitch lines can leave marks, and the extra room may not be where you need it. A tailor should examine the construction before making this alteration.
Sources and references
- DGCCRF, clothing labels, accessed October 1, 2026.
- ADEME, choosing, caring for, and repairing clothes, accessed October 1, 2026.